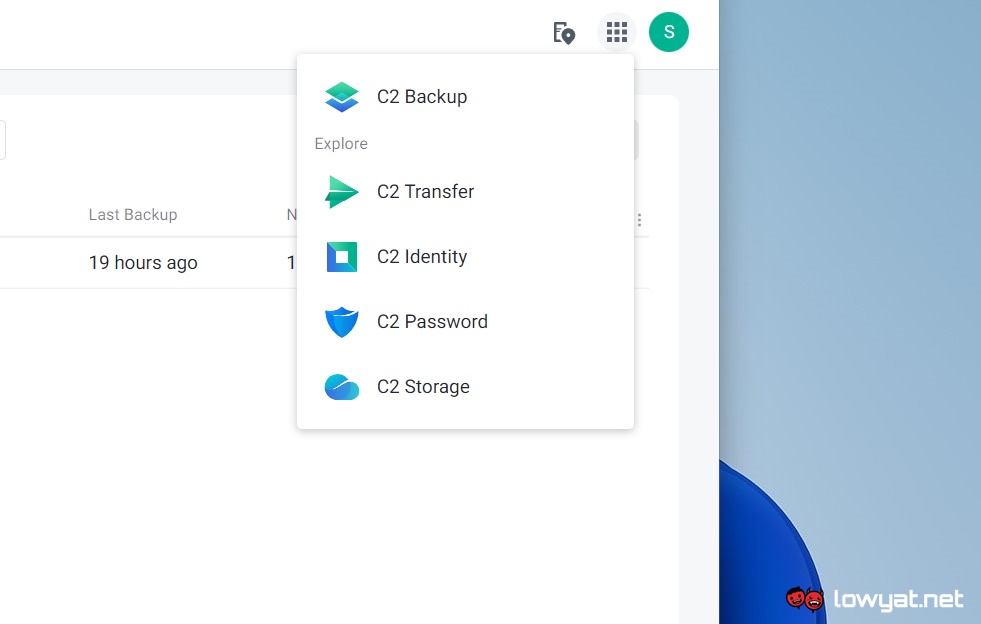
Designed to meet the need of not only enterprise users and IT professionals but also common consumers alike, the Synology C2 is a cloud suite that contains several individual cloud solutions. One of them is the C2 Backup which allows users to back up their Windows system and Microsoft 365 accounts securely to the cloud. In this article, I will focus on Windows system backup as an individual user. Now, performing periodic backup on your system is quite essential. However, many users are put off by it due to the complexity of the task but Synology C2 Backup may have the answer to that.
A BREEZE TO SET UP
I am fairly surprised to see how simple it is to get C2 Backup up and running because I thought that it would take me hours to set it. As it turns out, it only took me less than 10 minutes to sort everything out and in case you are wondering, you don’t need to own a Synology NAS to utilise C2 Backup as it is a standalone online service.
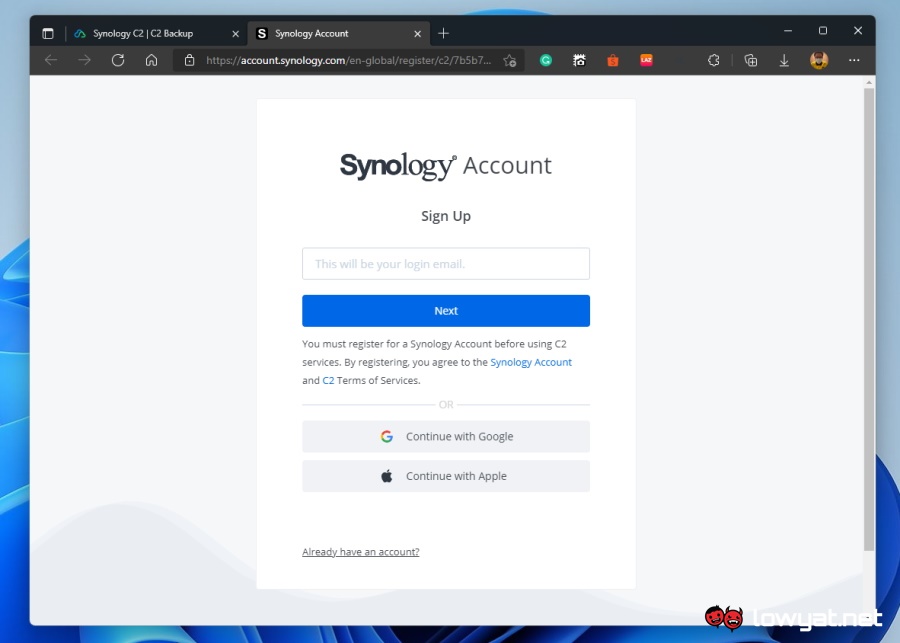
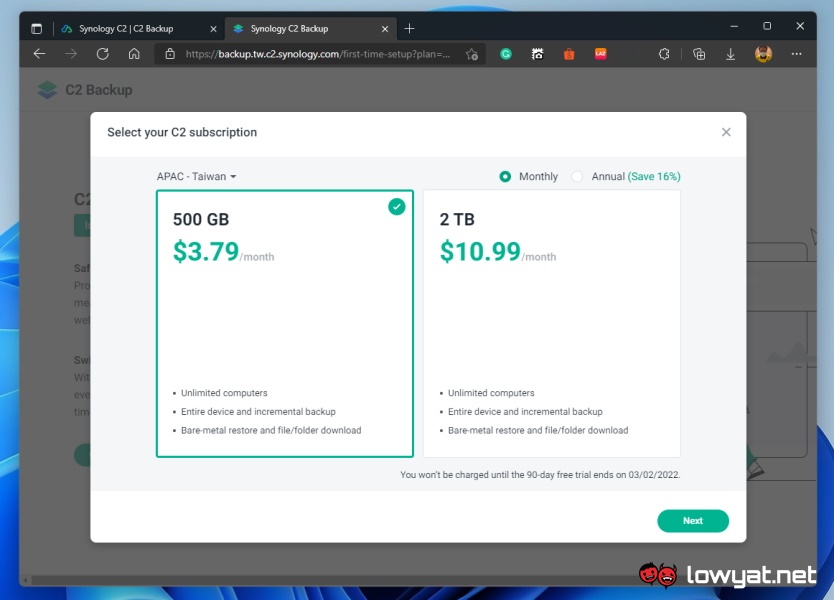
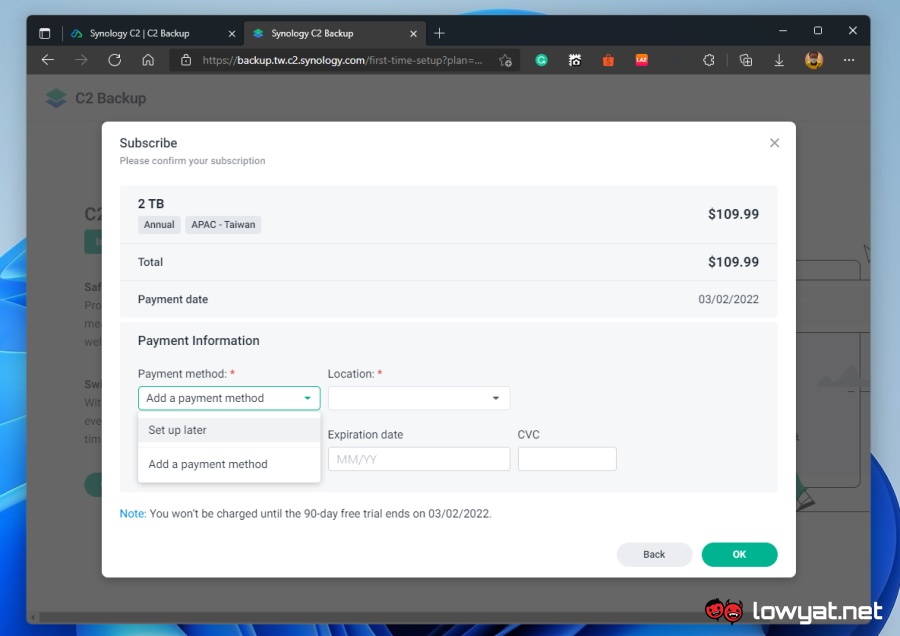
The C2 Backup journey starts with the creation of a Synology Account which comes at no cost at all. Once you sign in, you would be presented with the server option which also determines the currency of the subscription fee. Specifically, you have to pay in Euros if you choose the European server located in Frankfurt, Germany while the subscription fee for the North America server in Seattle as well as Taiwan for APAC is priced in USD. There are also some differences in pricing between them when you convert to RM, so make sure you pay attention to that too.
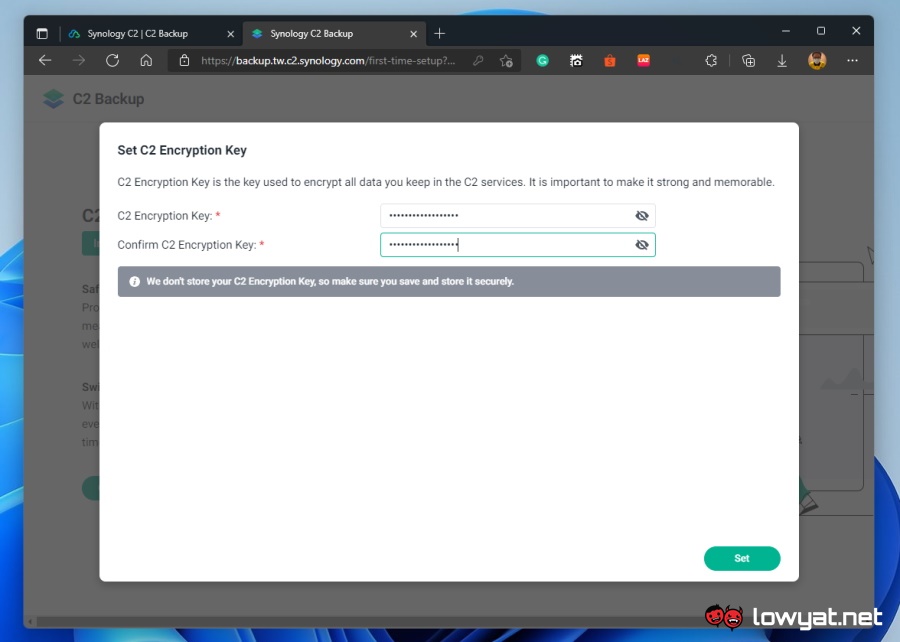
Users can choose to pay on a monthly basis or opt for the annual fee which provides some savings on their subscription fee. Here’s the full subscription fee list when I tested the C2 Backup: 500GB at Europe – Frankfurt: EUR3.49 (~RM16.67) per month / EUR34.99 (~RM167.17) per year 500GB at North America – Seattle: USD3.49 (~RM14.77) / USD34.99 (~RM148.08) 500GB at APAC – Taiwan: USD3.79 (~RM16.04) / USD37.99 (~RM160.77) 2TB at Europe – Frankfurt: EUR9.99 (~RM47.73) / EUR99.99 (~RM477.64) 2TB at North America – Seattle: USD9.99(~RM42.28) / USD99.99(~RM423.16) 2TB at APAC – Taiwan: USD10.99 (~RM46.50) / USD109.99 (~RM 465.42) Since Taiwan is closer to Malaysia, the choice was rather obvious. Once the subscription plan has been sorted out, users would then be asked to create the C2 Encryption Key which acts as a password that you have to enter when you want to restore your system or download individual files and folders from the C2 Backup.
The last step required in setting up the C2 Backup is to save the provided Recovery Code which would then be used to recover your data if you somehow have forgotten the C2 Encryption key that you set up earlier. You can choose to copy the raw code yourself or download a text file containing the key for safekeeping.
NO CREDIT CARD INFO NEEDED FOR TRIAL
Before we go further, let’s circle back to another interesting characteristic of C2 Backup which is the lengthy trial period of 90 days. During this period, all of the features within the service can be fully utilised by users including the ability to utilise C2 Backup with an unlimited number of computers as long as there is still storage space within your plan.
While that may sound nothing out of the ordinary for some users out there but here’s the thing: Synology does not ask for any upfront payment information before users can test out the C2 Backup. This means there shouldn’t be any surprise inclusion in your card statement once the trial period is over. However, do note that this no-upfront-payment 90-day trial policy is only available for users that signed up for the C2 Backup trial before the end of 2021.
SIMPLE INTERFACE, ZERO HEADACHE
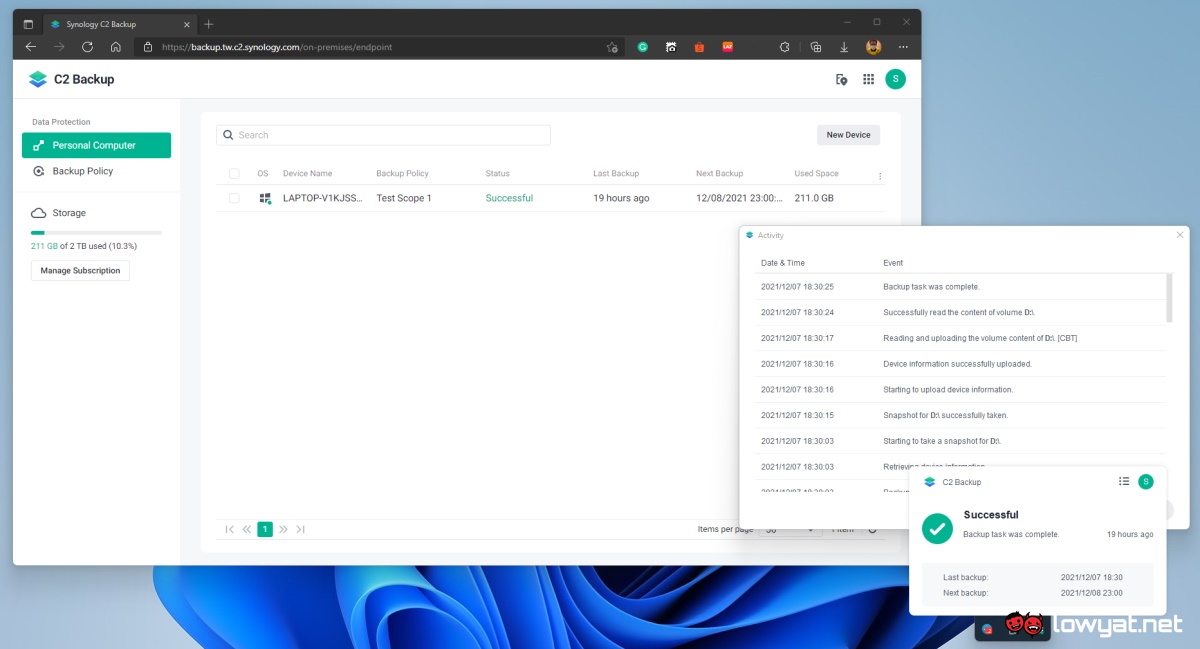
For the C2 Backup service to work, users first need to download and install a small agent software that has a file size of around 92MB into every machine that they intend to back up to the cloud. However, the C2 Backup agent software mainly acts only as a status indicator and activity logger.
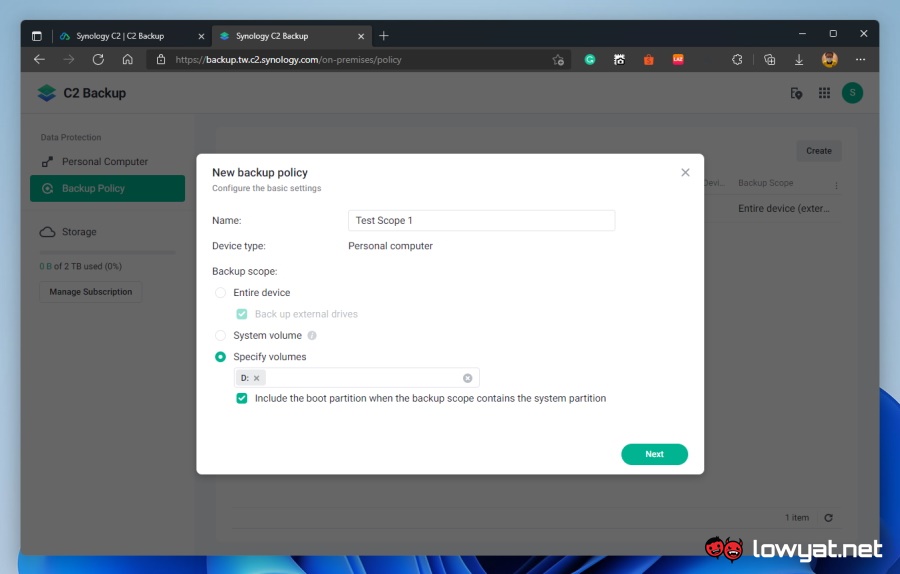
To access or run the main functionalities of the C2 Backup services, all those take place through the web browser. This way, Synology has generally cut down compatibility issues and allows C2 Backup to be used across multiple versions of Windows operating systems from Windows 7 SP1 to even the newly released Windows 11. The company has also implemented a simple 3-step backup policy wizard into C2 Backup which made it so easy, especially for first-time users to back up their machine. Through the wizard which can be invoked by choosing Backup Policy » Create, users can choose to either archive the whole system, system drives, or specific drives.
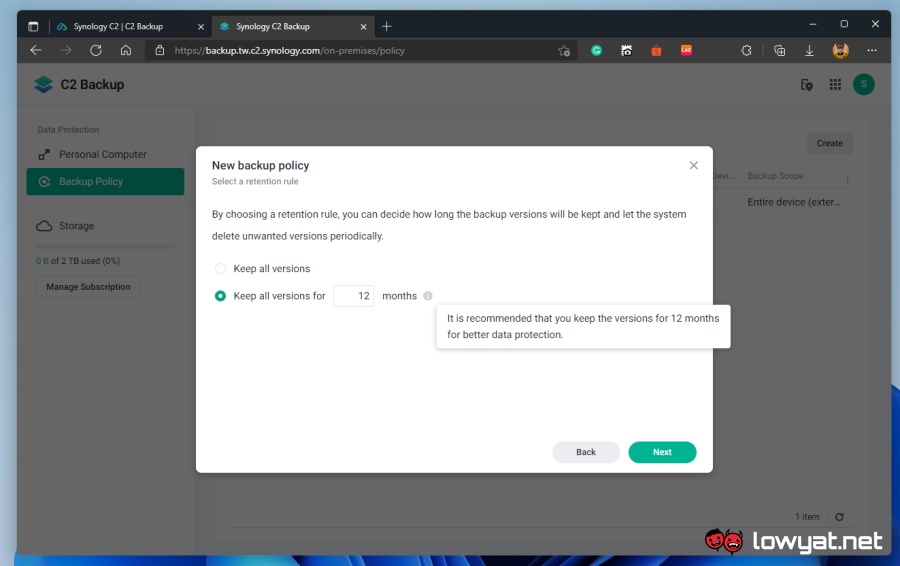
After that, users can proceed to set the schedule of the backup process. Users can also set the backup process to take place according to certain system events such as when the machine has just been turned on or when they logged out of it. Last but not least, you can also choose to keep all individual versions of the backup or let C2 Backup delete the older versions in just a month, although Synology recommends that users keep the backup for at least 12 months for better data protection.
Once all the parameters above have been set and saved, the wizard will then ask the user which machine to apply. Choose the system, press OK, and you can now let C2 Backup do its magic. By default, the C2 Backup will back up your entire system including both boot and system partitions as well as external storage drives to the cloud. Under the default setting, the backup process also takes place on a daily basis and the service also preserves all versions of your system.
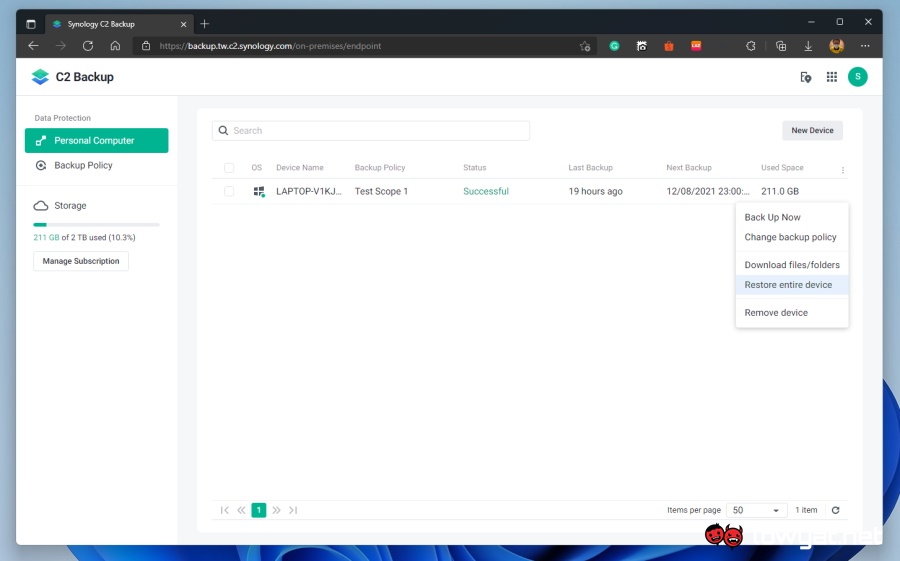
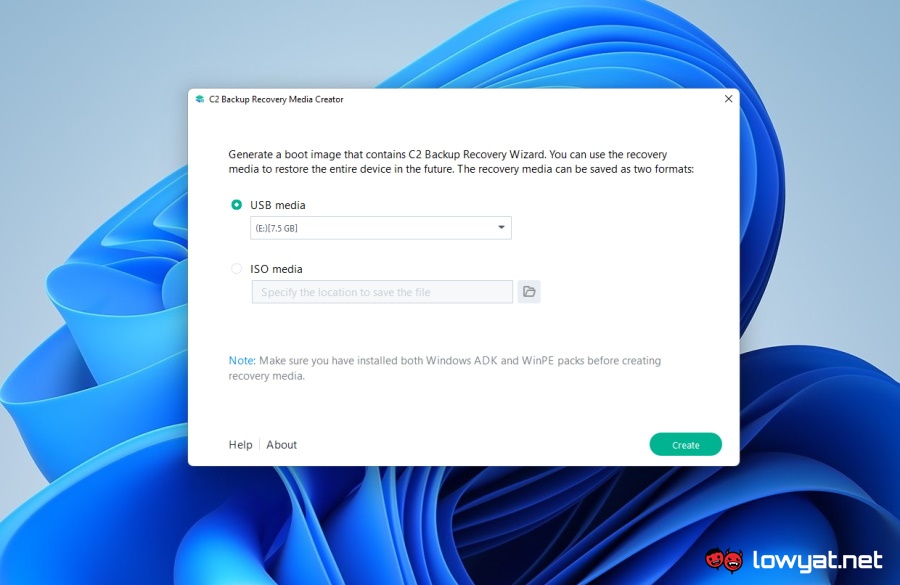
Now, let’s move on to the recovery process. We can all hope that it would never happen to us but if you have experienced catastrophic system failure, the C2 Backup is here to help you get back on your feet in no time. To perform a full system recovery (also known as bare-metal recovery), go to the Personal Computer section from the C2 Backup dashboard and choose the Restore entire device option on your chosen system. A prompt will appear with a brief explanation regarding C2 Backup Recovery Media Creator which users can use to create an ISO file or bootable USB device to restore their system.
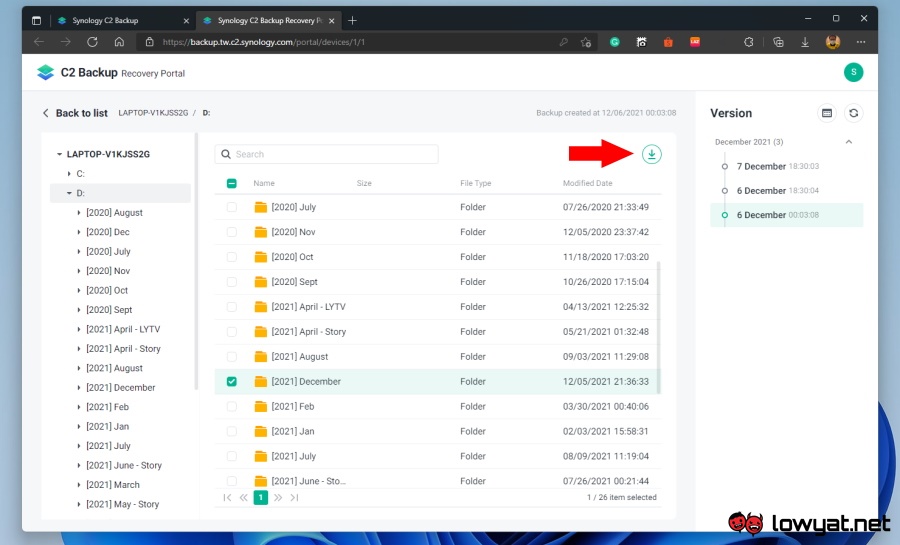
Once you install and run the C2 Backup Recovery Media Creator into the new system, just follow the steps shown on the screen to retrieve back all the files and folders from your previous machine. Do note that the creation of the recovery media requires you to download Windows Assessment and Deployment Kit, so do give yourself a bit more time to complete the restoration process. Aside from providing full system recovery, C2 Backup also allows users to download individual files or folders which reflects the flexible nature of the service. All you need to do is choose the Download files/folders option on your chosen system in the Personal Computer section of C2 Backup’s dashboard which would then open up a new tab in your web browser. After that, enter your C2 Encryption Key as requested and you can now immediately choose the folders or files that you want to download. They will then be compressed into a Zip file for download.
CONCLUSION
As per what I mentioned earlier, backing up a system is a gargantuan task especially given the fact that we use more disk space than ever these days as programs become more complex alongside the popularity of high-definition video content. However, Synology’s C2 Backup has made the task a breeze and seamless. With a starting price of just around RM15 per month, the C2 Backup plan could provide you with an absolute peace of mind knowing that your system backup which may contain files that are critical, precious, or valuable to you are being securely stored by one of the most renowned names in the storage industry. Furthermore, the 90-day trial without the need to provide any payment or credit card details is a major plus point as one can completely test out the C2 Backup functionality without any pressure. To learn more about the C2 Backup, head on to Synology’s official website right here. This article is brought to you by Synology.
